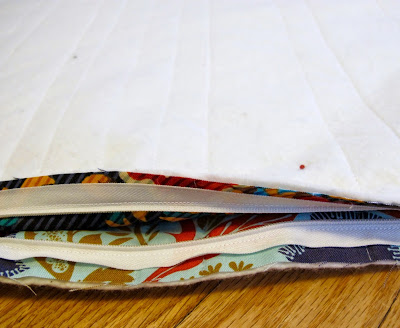
Euro Shams are kind of fancy, right? I have a plan to use mine to make some benches in my entryway more comfortable, but they also adorn beds and sofas. These plump 26-inch pillows can easily be covered in fabric of your choice to decorate your space! Invisible zippers seem tricky, but they are approachable once you get the hang of setting them up, and using one allows you to create two seamless pillow faces.
If you're making a different size of square pillow cover, you can easily adjust the dimensions, using the same techniques below.
1. The most fun: pick your fabrics! Since we're using an invisible zipper to close the pillow, you can even choose two different fabrics to make your sham reversible.
Materials needed:
Two 27-inch squares quilting weight fabric of your choice
(1.5 yards one fabric or 3/4 yard each of two fabrics)
Two 30-inch squares of batting of your choice
One 25-inch invisible zipper (or longer)
One 26-inch euro sham pillow form
2. Cut your fabric into two 27-inch squares, and cut batting pieces about 30 inches square. The batting doesn't have to be perfectly cut as long as you have at least an inch of batting showing around all sides of your fabric when fabric is placed on batting.
3. Press your fabrics and place them on top of the batting squares, smoothing out any wrinkles.
4. Baste the fabric and batting together as desired. I like to use a needle and some junk thread, but basting spray or safety pins work, too. In a pinch, I've basted with regular straight pins, which works fine on such a small project.
6. Trim off the batting, squaring up corners.
7. Zipper time! Lay the two sides of your pillow cover next to each other, right sides up. Mark or pin each piece 2.5 inches from the top and bottom (4 marks/pins total). Now is the time to think about how you want to orient your quilting lines or any directional prints.
8. Mark a seam line 5/8 inch from each edge on both fabrics.
9. Unzip the zipper, and using your iron, press to unroll the zipper teeth so each zipper half lays flat.
12. Using a zipper foot, begin stitching at the pin or mark you made 2.5 inches from the top. Backstitch to secure the zipper, and slowly sew as close to the zipper teeth as you can. There are special invisible zipper presser feet, so if you've got one of those, you should try it out! If you don't have one, a regular zipper foot gets the job done, too.
13. After you've stitched most of the way down, you will get to a part that seems kind of tricky: the end where the zipper slider is. Just continue stitching as close to the zipper as you can get. Backstich, and you're done with the first side!
If you fold back the top piece, you should be able to pin the other side of the zipper to the bottom piece along the bottom piece's 5/8-inch line. Make sure to align it so the bottom of the zipper slider matches up with the pin or mark at 2.5 inches from the bottom of the bottom piece. Align the zipper teeth with your marked 5/8-inch line and pin, just as you did on the first side.
15. On my machine, stitching the second half of the zipper requires switching the position of the zipper foot (it just slides over). Begin at the pin or mark 2.5 inches from the top and stitch to the zipper slider, just like the first side.
16. Leaving the zipper open (still!), pin the two sides together, fabric sides facing together.
17. Start sewing the pieces together at the bottom end of the zipper, working towards the corner, allowing a 5/8 inch seam. Overlap your seam and the zipper by a few stitches by using your zipper foot underneath the zipper end. Backstitch for strength, and switch to a walking or regular foot once you're clear of the zipper. Zipper tails should be pulled clear of your seam line.
18. Stitch the remaining three sides closed with a 1/2 inch seam. When you get back to the zipper side, sew a 5/8 inch seam, using your zipper foot again to stitch just past where the zipper is attached. This process is roughly illustrated below, following steps a.-e. along pink seam lines.
19. Remove any pins, clip corners if that's your style, and turn your pillow right side out via the zipper opening. Check out your zipper!
20. Stuff with a 26-inch square euro sham pillow (I got mine very affordably at HomeGoods) and ENJOY!


No comments:
Post a Comment
Hi, nice to see you! Sorry about the word verification but I've been flooded with spam messages recently. Thanks for commenting!