01 October 2012

What?

A month since my last post?  Apparently. 


I while back, I was approached with a request for a custom baby quilt like this one, only done in  beige, brown, and cream.  Oh, light blue, navy and gray could be included, too, in little bits.  

Needless to say, using a constrained and subdued palette was a challenge for me, but I was able to work with the customer to incorporate fabrics we both liked, with enough of a range of values to make the improv log cabins look interesting.  


I think that while I really enjoy sewing with bright and crazy colors, they aren't necessarily the colors that I would always decorate a room with, so I also was interested in the project for the practical challenge.  


While the original Dewberry trees weren't available in this color range, I found this cute but not cutesy print from the Storyboek line from Birch Fabrics.  


I liked it so much that I fussy cut the cute animals and trees into a strip for the back. 


I had never done a "repeat" quilt before, and I found it to be pretty hard.  It felt more like work than fun, which is what sewing is supposed to be, for me.  I would up LOVING the back of the quilt, though, and I guess that having to repeat the front pushed me to come up with something new that I'd like for the back.  


I quilted it in alternating single and double diagonal lines, bound it up with cute beige dots, and sent it off to its new home all washed and crinkly.  


Pin It!

30 August 2012

Adding: A "Plus" Quilt

Last Fall, a stack of plum, pink, aqua, orange, and red fabrics called out from the shelf.  I had been wanting to do one of these "plus" quilts for quite some time, and I based it off this tutorial, bumping the cut size of the squares up to 5.5 inches. 


A plus quilt is a fun alternative to the traditional patchwork, and comes together in much the same way:  lay it out, sew the rows together, and enjoy! (I had some some help.)


I decided that rounded corners would contrast nicely with the sharp geometric design of the quilt, and forged ahead with the necessary bias binding in Kona Aqua.


It's backed in an aqua and gray dot, and I quilted it in evenly spaced diagonal lines to form squat diamonds.


It measures about 60 x 70 inches and features so many of my favorite prints that I wish it was still around... 


but it warms my heart to imagine this one getting used all the time!!

It's also a who's who of the fabric design world: I threw some Dewberry, Schmidt, Wells, Butler, Whelan, Ross, Henderson, Paganelli,  Dena Designs and more all together and love how it turned out. The only one missing is some Anna Maria Horner (I have some of her most recent on the way, though...stay tuned)
Pin It!

31 July 2012

Sharp Chevrons

Rainy days.

Perfect for watching old musicals, sitting on the couch with a cat or two, and some blog catch-up.

I've seen quite a few requests from you about how I made these very sharp, precise chevrons last year for the 4x5 Modern Quilt Bee:


Well, to make 'em, I sketched out quadrant templates on graph paper, and sewed together a bunch of 1.5" colored strips and .75" strips of white and trimmed (and trimmed), winging it a whole lot, holding the strips up to the sketch to check on positioning.

Halfway through, I wondered why I wasn't just using a paper foundation.  Too lazy and stubborn to go make copies,  I finished my blocks using the original method anyway.  Silly.

That's probably not your style, so I created a paper-piecing template, available for free via Google Doc! It's a little bit rough around the edges, but it's a pretty literal digital interpretation of my original sketch.  **If you access the templates via Google Doc, it will work best for you to download the pattern and access/print it via your pdf viewer.**


Notes on making your own: 

Print 2 copies (to make 4 units).

Printing Tips: Google docs isn't the best for printing templates, so I'd recommend downloading/saving the template to your computer, then opening it with your usual PDF viewer (Adobe has worked best for me) to print from there. Make sure that scaling is set to 100%, "Actual Size" or "none"' (so your comp doesn't try to "fit" it to a page), and measure the 1 inch scale line once printed to make sure it's EXACTLY one inch, no more, no less! Go the extra mile, and measure the short end of one of the templates, including the gray seam allowances.  It should be 2.5 inches.

I numbered the pieces so that seams will fall in opposite directions, making it easier to join the sections, and I'd also leave the paper on until the very end, but know that paper-piecing is quite personal ;) Join the sections into two A-B units, then join those two to make an 8"x8" finished block!  For the 4x5 Bee, I sashed them with 2.5" strips of white to bring the final size to 12.5".


(If you're not in to paper piecing, I also really love this tutorial for chevrons!)


I've written more about sampler bees I've been in here and here, and to refresh, each member of the group requests certain colors to receive, and then makes blocks in everyone else's colors.  So fun! 


As always, my favorite part is getting to test out all different color combinations! I think this block would also look great with a scrappy collection of fabrics (instead of making each row uniform), or with dark fabric in place of the white for the skinny rows.


Pin It!

15 July 2012

Vacationland

Maine's state nickname is Vacationland. Really. One word.

Amidst my new summery life of boat rides, sunscreen, and beers in the backyard, I have been sewing, just a little. My current project has to stay secret for a little while, but here's a peek at how things have been going.

I always love to see people's before and after shots, so I quickly snapped this nice pair.  I keep my fabric in an old kitchen cupboard, and getting that thing up a narrow staircase is one of the best achievements of my move.

Before:

(Inspection, of course.)

And after:


(Likely the most organized --mostly by project, few by color-- this space will be for a good long time. Yep, this is neat, for me!)


05 July 2012

Did you know...

... that unpacking is just as hard as packing, but with less urgency?  We're settling in, slowly but surely.


Sewing supplies are getting unboxed this afternoon, to be set up in this little windowy nook!

11 June 2012

Moving break...

I'm getting ready for a HUGE move at the end of the month, so I won't be around much for a few weeks.

Of course, I've determined that my fabric and sewing supplies should be packed last, just in case I get the itch.  

But other things...

...many other things... are getting packed up.

It's a little stressful.

And flat-out exhausting.


But totally worth it, since this is the prize at the end!

07 June 2012

Quilting Bee Spotlight: Neutral and Not

I love my quilting bees, as you can see here, here, and here.  After getting comfortable with their structure and rules, I wanted more, so I decided to start my own!  Neutral and Not was born out of my love of monochromatic quilts.  I'm so drawn to quilts that use limited colors and high contrast to create geometric impact, so I thought this would be a fun framework for a bee.  

(If you're interested, Rachel wrote a fantastic post about bee basics: what they are, how to find one, how to start one!)

The idea for this bee is that, each month, the queen bee can pick a one neutral tone, and one that is decidedly not. Red and white is such a classic, but what about red and bone? Gray and yellow? Aqua and sand? Coal and rose? Flame and stone? Before I got carried away, I also wanted bee members to be able to branch out to whatever colors/ideas they wanted, since I think getting what you want is an important part of a bee.

It can be a lot of work to lead a bee, wrangling 12 members all over the globe, tracking fabrics and blocks and missing members, but these lovely ladies have made it a breeze for me!  We're at a halfway point right now, so I thought I'd share what we've worked on so far.  

November 2011:
In November,  Esther assigned us Dresdens - any kind! - sent out a deep brown and some grassy prints, and changed my life.  I used this tutorial, modified to make the petals smaller.  No more Dresden fear!

January 2012:
After a holiday break, Stephanie asked for dark bird silhouettes on bright wonky tree branches.  I really loved seeing all the other members' blocks coming in for this one, since they were all so creative and different!

February 2012:
For February, Susan sent out some really lovely grays and aquas, requesting wonky log cabins.  This was actually the first time I'd ever made one!

March 2012:
Who doesn't love working with all solids??!  In March, Christina sent us some grays and a gorgeous array of purples, and requested star blocks.  I used this pattern for this little beauty. Christina's star inspiration mosaic is a terrific resource for star patterns, too!

April 2012: 
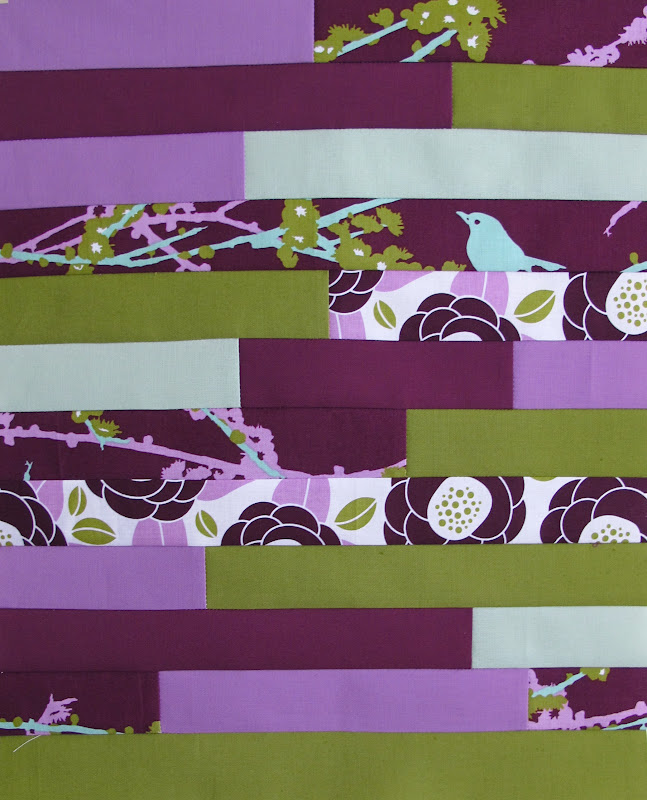
In April, Melisa took her inspiration from an improvised table runner made up of little strips.  I think this will make such a stunning quilt!

May 2012:

And, for May, Ella sent out grays and rosy tones to make these graphically bold wheel blocks.  Quick to sew up, with stunning results.

Can't wait for the fun to continue! To see the rest of our talented members' work, check out our Flickr photo pool!