Showing posts with label quilting bee. Show all posts

31 January 2016

Citron and Aqua Sampler Quilt


How did I let this stack of blocks languish in my sewing cabinet for so long (years)? I'm not sure what I was waiting for, but earlier this winter I pulled out blocks accumulated from a few rounds of the 3x6 and 4x5 quilting bees.


16 August 2013

Reverse-Value Mod Mosaic Quilt

Another summer WIP finished!  It has been so stinkin' nice out up here recently, and I took it outside for some glamour sunshine shots.


Back in March 2012 (ouch!) I asked members of the New Bee on the Block quilting bee to make me Elizabeth Hartman's Mod Mosaic Blocks for my month. Instead of using white for my "tile grout" strips, though, I sent out Kona Cerise, and used Kona Snow and a pretty print from Lotta Jansdotter's Echo line as background. I love how the geometry becomes the focus, not the prints.

13 February 2013

Quilting Bee Spotlight: Neutral and Not II

It feels like time for a bee block post!  In 2012, we wrapped up Neutral and Not, a 12-month bee that I created after being inspired by the red and white quilt show in NYC a few years ago. I profiled our first six assignments earlier, and here are the rest:

June 2012:


Wayyy back in June, Tiffany sent out black, white, and splashes of color, requesting that we make anything we wanted using half-square triangles.  Just the kind of "guided freedom" that makes bees so much fun! I made a modified version of the star block in this tutorial.

04 November 2012

Quilting Bee Spotlight: Quilting Under the Rainbow II

Year-long quilting bees are a tough commitment! I don't think I've been in one that survives the year with all members intact, but this one, Quilting Under the Rainbow, came pretty close. Finishing up this fall was very satisfying, and I'm excited to share more about this group.  I always love reading bee block blog posts, since it's a perfect way to browse and store away ideas for future quilts.


I've written about the first six months here, and showed off my finished quilt, as well.

Here are the rest of the blocks I made.


In March, Leah sent us stained glass-inspired fabrics to make blocks for Elizabeth Hartman's Mod Sampler.


For April,  Jackie requested some fun inserted strip blocks.


May rolled in, and with it came bright fabrics from Ellie for these starflower blocks from Ellison Lane.


In June, we made up granny squares for Karen.


And, last but not least, we worked our creative muscles to make all different and unique leaves for Aud's trees. My first time with fusible webbing!

I've been busy lately with new, exciting, and totally non-quilty things in my life, but recently bestowed myself with a day off to sew.  Pictures and a finish to come soon!


Pin It!

07 June 2012

Quilting Bee Spotlight: Neutral and Not

I love my quilting bees, as you can see here, here, and here.  After getting comfortable with their structure and rules, I wanted more, so I decided to start my own!  Neutral and Not was born out of my love of monochromatic quilts.  I'm so drawn to quilts that use limited colors and high contrast to create geometric impact, so I thought this would be a fun framework for a bee.  

(If you're interested, Rachel wrote a fantastic post about bee basics: what they are, how to find one, how to start one!)

The idea for this bee is that, each month, the queen bee can pick a one neutral tone, and one that is decidedly not. Red and white is such a classic, but what about red and bone? Gray and yellow? Aqua and sand? Coal and rose? Flame and stone? Before I got carried away, I also wanted bee members to be able to branch out to whatever colors/ideas they wanted, since I think getting what you want is an important part of a bee.

It can be a lot of work to lead a bee, wrangling 12 members all over the globe, tracking fabrics and blocks and missing members, but these lovely ladies have made it a breeze for me!  We're at a halfway point right now, so I thought I'd share what we've worked on so far.  

November 2011:
In November,  Esther assigned us Dresdens - any kind! - sent out a deep brown and some grassy prints, and changed my life.  I used this tutorial, modified to make the petals smaller.  No more Dresden fear!

January 2012:
After a holiday break, Stephanie asked for dark bird silhouettes on bright wonky tree branches.  I really loved seeing all the other members' blocks coming in for this one, since they were all so creative and different!

February 2012:
For February, Susan sent out some really lovely grays and aquas, requesting wonky log cabins.  This was actually the first time I'd ever made one!

March 2012:
Who doesn't love working with all solids??!  In March, Christina sent us some grays and a gorgeous array of purples, and requested star blocks.  I used this pattern for this little beauty. Christina's star inspiration mosaic is a terrific resource for star patterns, too!

April 2012: 
In April, Melisa took her inspiration from an improvised table runner made up of little strips.  I think this will make such a stunning quilt!

May 2012:

And, for May, Ella sent out grays and rosy tones to make these graphically bold wheel blocks.  Quick to sew up, with stunning results.

Can't wait for the fun to continue! To see the rest of our talented members' work, check out our Flickr photo pool!

09 April 2012

Quilting Bee Spotlight: New Bee on the Block

 
With a nice long holiday weekend in the fresh air behind me, I'm quite happy.  But my sewing machine had to stay behind!  So I decided to work a bit more on chronicling my past work, specifically, for New Bee on the Block, a quilting bee started and hosted by the wonderful Shanna to help people get into the quilting bee world.

Um, it worked for me!  Last July, I was a total Newbie.

If you're interested in joining a quilting bee, I'd say: 1) sign up for Flickr and post some photos of your work 2) visit the Quilting Bee Blocks group's discussion thread where people post about new bees they're organizing to see what's going on!

I really appreciate the collective effort and group atmosphere of virtual bees.  I don't have a community of quilters in "real life", and it's so fun to have these deluxe virtual penpals.  They are so supportive and cheerful, and I love the updated version of a historical pastime!  We gather around glowing screens instead of glowing fires in a barn (yes, that's how I imagine back-in-the-day quilting bees), but the sentiment and outcomes are the same.

I've been so lucky to work with this group of very talented quilters!  New Bee on the Block is a 12-month, non-themed bee, where each month, one member sends out fabric and instructions (for whatever they want!) to each of the 11 other members, they sew them up, and send them back.  As you'll see, this bee has exposed me to ALL KINDS of blocks, and has really expanded my skills and sensibilities.

Here's what we've worked on:

July 2011: 

To kick off our bee, Holly sent out fun, bright fabrics to make a perfect pinwheel Merry Go-Round block (without paper-piecing!)

August 2011: 

Ella sent out gray heath and raindrops fabrics and asked for a version of Quiltjane's teardrop block.  It's paper-pieced, and was my first experience with a really non-traditional paper-pieced shape.

September 2011: 

For our first taste of free-form quilt bee blocks, Lina gave us very simple guidelines:  rectangular blocks in the theme of books or reading.  What could be better than a stack of books and a cup of tea? I had a lot of fun with this block!  I sketched out a teacup on some graph paper and paper-pieced it,  adding some hand-stitched steam, and swiped a bit of Anna Maria Horner selvage for one of those books :)  

October 2011:

More freedom!  Ellie assigned us any kind of wonky stars we liked!  So, I decided to put a tiny star inside a big one. I just love those elephants.  

November 2011:

Natasha asked for sharp, graphic, Piet Mondrian-inspired blocks.  I got to slice away and piece improvisationally, and I almost stole the honeycomb and herringbone prints she sent!

January 2012:
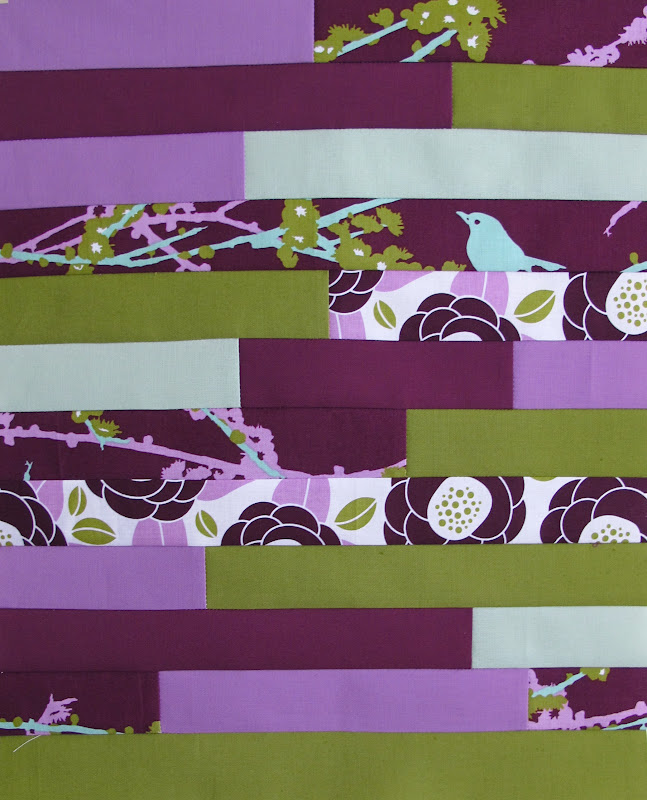
After a customary December break, Diane got us back into the swing of things with scrappy Japanese x and + blocks from Badskirt.  These fun blocks are all over the place these days, and this was a great opportunity for me to try making them!  Di has been working away at these blocks, and has even started mocking up her quilt.

February 2012: 

In February, Tonya asked us for a paper-pieced Friendship Circle (how appropriate for this bee!) This is one of those blocks that also makes a secondary pattern when you put them all together, and I think this is going to be a really lovely quilt!

March 2012:

For my month, I asked for help making blocks that are all about texture, using Elizabeth Hartman's Mod Mosiac tutorial. I had made a pillow like this before, and I decided I wanted a whole quilt! I switched up the typical scenario, choosing a solid color to frame mostly white scraps, instead of using white for sashing colorful scraps.  The blocks are still coming in, and I can't wait to start putting them together!

April 2012: 

For once, I'm a little ahead of the game!  I finished up this Kansas Dust Storm for Lia, who picked out a bunch of different stars for us to make.  I loved using the springy, fresh colors she sent out for what will be a picnic quilt.  I hope it gets a lot of use!

I'm a little sad that we're approaching our last few months, and excited to see what else is in store!


simply square button
On a side note, I just learned about what it means to be a no-reply blogger-- basically, people can't easily find you to write back if you leave a comment!  I was one, but fixed it, thanks to Shanna (kind of like your nice friend telling you when you have something on your face...) and this post I found at Pleasant Home. (Are you a no-reply blogger? Do you know how to check?)

Pin It!

28 March 2012

Diamond Stack Block - Tutorial

This quarter, for the 4x5 Modern Quilt Bee, I decided to experiment with a new shape: the diamond, without templates or paper-piecing.  I wrote a little bit more about how the bee works here.  This time, I asked for scrappy, saturated, multi-color blocks. 


This was my test block!  I think it's much easier to make than it looks, but you do have to be consistent with your cutting and piecing.

Materials to make one 12.5-inch square block: 

9 1.75" x 3.5" pieces (these will become the little diamonds) in colors of your choice
6 1.5" x 3.25" pieces white (or other background fabric)
2 1.5" x 9" pieces white (or other background fabric)
4 1" x 8" pieces for the lattice between little diamonds, in coordinating colors
2  roughly 7-8"x 11-12" rectangles white (or other background fabric)*

*these could theoretically be much smaller, or maybe you can think of a better way to fill out the background, but this is what I used to make sure I had enough area covered.

Get going!

To start, cut up the nine 1.75" x 3.5" pieces into diamonds. 
 
Line up the 60-degree line of your ruler along the top of the fabric, so that the line your ruler intersects with the bottom right corner of the fabric. Cut!

Keeping your ruler's angle and the fabric as-is, with the 60-degree mark along the top, slide the ruler over 2 inches from the (new) top right corner of the fabric.  It helps to use the 30-degree angle line (pictured above, but it doesn't show the 30-degree label... it's the one that makes a right angle with the 60-degree line) on your ruler lined up with the vertical cutting mat lines.  

Cut!  You can stack your rectangles and do a few at once, or go one at a time, if you like. Here, I did three at a time.  You can also continue cutting diamonds at 2-inch intervals from one long strip of 1.75" fabric.

Arrange your diamonds in a 3x3 grid!


Pair up six of the diamonds with one 1.5" x 3.25" strip as pictured.


Position the white strips so that there is about a 1/4-inch overlap of white extending beyond the diamond's edge.


Sew, (using a 1/4-inch seam), press, and trim top and bottom, using the edge of the diamond piece as a guide.  For the entire block, I pressed my seams away from the diamonds, but you can do whatever you like best. 


You'll end up with 6 of these suckers!

Match them up with a lonely diamond, and sew together each line of three units so that you have three pieced diamond strips.  


As you piece together the diamonds, make sure you leave little tails (measuring a scant 1/4-inch) on both sides.  This will help the edges of the diamonds line up.  


Do the same thing if you're just adding on a diamond to a white piece, don't forget the tails!


You'll end up with three strips. Don't worry too much if they're not lining up perfectly, but they should look pretty decent.  


Trim off the little tails!


Attach the the two 1.5" x 9" white strips to the first two lines of pieced diamonds.  Make sure to leave an inch or so of white overhang on either side, so that there will be fabric in the right spot when you trim along the sides of the diamonds. 

Be gentle when you sew, since you're sewing along the bias-edge of the diamonds. Press open and trim, following the angles of the diamonds again.  


Connect the two strips that have a strip of white (pins really help at this point!) and press open.


And attach the final line of pieced diamonds.  Press open.  (See those little triangle tails sticking out?)


Trim 'em.


Now you have this. It would be pretty on it's own, or you can go ahead and insert lattice strips!


I think this is my favorite part!  Using your ruler, line up the 1/2 inch mark along the edge of one of the white strips, and cut, dividing it along the middle. This will create the effect of having stitched on tiny 1/4-inch white borders around each diamond, without having to work with a bunch of tiny pieces.  


Do it again on the parallel white strip, to create three pieced diamond strips again.

Now you can connect them with colorful lattice strips, just like you did with the white strips earlier.

Take two of your 1" x 8" lattice strips and sew them to the side that has white of two of the pieced diamond strips. I definitely use pins at this point, especially, because the lattice strips are so narrow. 


Sew both, press, and trim.


Attach the two pieced strips that have lattice strips sewn on.


And attach the final diamond strip.  


Slice again, in the other direction!


Sew the final two lattice strips on, press, and trim.  (err, not trimmed yet in the picture...)


Attach them all together, and you have your diamond!


Trim off all the tails, perhaps taking a little fabric off with them to straighten up your edges.  Just a bit, because sashing can make up for any slight unevenness.  

At this point, you can sash the blocks however you like to reach your desired finished size.  I think they'd look great as rectangles, but for this bee, I had to get them to 12.5 inches square. 

That's what took the most trial and error for me.  I had to figure out how to "block out" the diamond to make a square 12.5-inch block.  It's possible my fabric size suggestions might be too high for you, but I like to have a little wiggle room.  Nothing's worse than sewing something up and realizing it's just a quarter inch too small. Yikes.

Basically, I cut two rectangles diagonally, using the 60-degree line on my ruler, echoing the angle of the diamond, and sewed the 4 resulting triangles to the edges of the diamond to make a square.  I did this various ways, depending what fabric I had on hand. There's likely a better way, but here are a couple of diagrams of how I did it.

They're not to scale, and don't line up perfectly in real life. There was a lot of trimming involved after the pieces were attached to the big diamond.  

In this case, I cut a long skinny rectangle into two pieces that would fit in the top right and bottom left corners. 


Then I cut another rectangle, below, into two big, long triangles that would fill the other corners, overlapping with the other corner pieces. 


(In this case, you have to trim off the excess from the first two pieces before pressing open) You could also do four long skinny triangles like these, with not much more fabric waste.  Y-seams?  Sure, but that seemed more complicated to me.  Because I don't know how to do them.

I do know that it's all about the tails, right to the end.  


And a 12.5-inch ruler saves the day when squaring up, every time.  


Here are all my finished blocks, in the colors requested by my hive-mates.  See that gray one (bottom middle)?  I didn't have pieces of ash that were big enough for the huge triangles treatment, so I just used smaller ones and strips to fill the space. Another option!  

You can see all my blocks up close here, where I write a bit more about my color choices and placement. 

Pin It!